Using custom post types to build an FAQ
 In my previous article I wrote about how to build dynamic sidebars using widgets. We used also custom taxonomies to create some filter criteria for single posts or pages. This article is about how to use custom post types to build an FAQ or testimonial section.
What are custom post types?
The custom post type is stored in the same database table as a normal page, post or attachment. The difference is in the way how you create one. A normal post type has a default configuration, while the custom post type provides all the settings you need to customize the behaviors and user experience. Use them for your products or any other non-standard post type.
How to create a custom post type?
You can create a custom post type using the function register_post_type() or you can use on of the plugins from the WordPress plugin repository. If you like to use a plugin, I suggest to use the Types plugin. I use this plugin for many sites to create my custom post types, custom taxonomies and custom fields. For this tutorial I create a custom post type with the slug/name “faq”, use the default settings if you’re not sure what they mean.
A simple way to create a FAQ page
The following code is just an example on how to build a page that shows the records from a custom post type. It’s a good strategy to create a template file which is used only for the FAQ page.
<?php /* Template Name: FAQ page */ ?>
<?php get_header(); ?>
	<div id="content">
		<?php if (have_posts()) : while (have_posts()) : the_post(); ?>
		<div class="post">
			<h1 class="posttitle"><?php the_title(); ?></h1>
			<?php the_content(); ?>
			<div id="faqs">
				<?php
				$args = array( 'post_type' => 'faq', 'posts_per_page' => -1 );
				$the_query = new WP_Query( $args );
				while ( $the_query->have_posts() ) {
					$the_query->the_post();
					echo '
				<p><em>'.get_the_title().'</em>'.get_the_content().'</p>';
				}
				wp_reset_postdata();
				?>
			</div>
		</div>
		<?php endwhile; ?>
		<?php endif; ?>
	</div>
	<?php get_sidebar(); ?>
<?php get_footer(); ?>
The first part of the code is exact the same code I have used in the first part of this WordPress series to build a regular page. In the middle part I build a custom query for the post type “faq” and the variable “posts_per_page” is set to show all posts for my selection. The “while loop” is the same as for the other pages, except that I’ve created an object “$the_query” which is used to get the values. Below the loop I use the function “wp_reset_postdata()” to clear the current result.
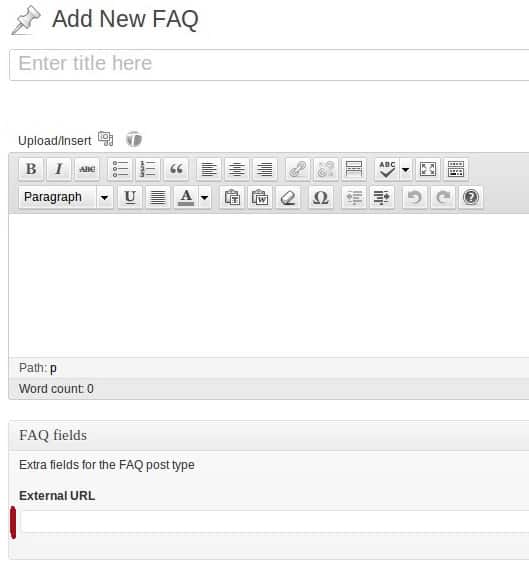
Now I need to create a new page with the name “FAQ” where I use this template. From the admin menu bar I’m able now to add new FAQ-posts. I use the title element for the question and the content field for the answer. The custom template will show the FAQ list right below the title/text of this FAQ page.
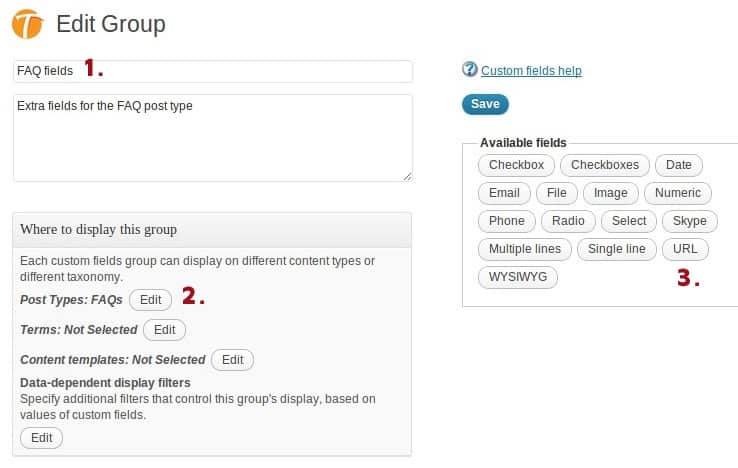
Custom fields for your (custom) post types
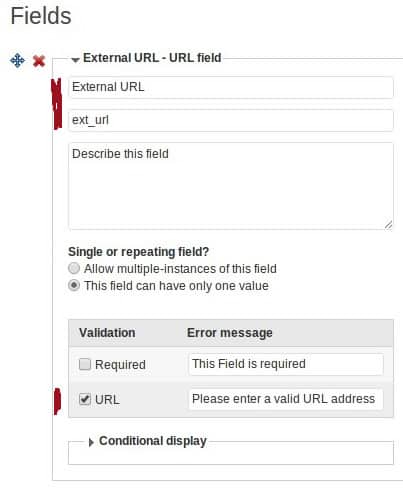
If you use the Types plugin to create custom post types, you can use the same plugin to create custom fields. You can use these fields for your pages, posts or custom post types. Let’s add a custom field to the FAQ post type to provide the option for an external URL.
Create more FAQ posts and add for some of them a value for the external URL field. Replace with following code the row that shows an FAQ record in your custom loop.
// ... $the_query->the_post();
// get the URL value from the custom field
$url = types_render_field('ext_url', array('raw'=>true));
echo '
<p><em>'.get_the_title().'</em>'.get_the_content();
if ($url != '') echo '<br /><a href="'.$url.'" target="_blank">External source</a>';
echo '
</p>';
Why not a simple FAQ page?
Sure if your FAQ list is short or you didn’t not change them very often, a simple page would be useful too. If you use a custom post type instead, you can use the FAQ data also on other places, for example a short list of FAQ items in the sidebar. I’m sure you can build your FAQ page much quicker this way.
Next week I will talk about the best WordPress plugins you should use for your website, stay tuned!
Published in: WordPress Development