A banner shortcode for ThirstyAffiliates
For affiliate links is link cloaking a great way to offer readable URL’s and secure redirects for your visitors. For a WordPress website is the free plugin ThirstyAffiliates an excellent choice to manage all the links using an easy to use system.
I use the ThirstyAffiliates plugin since more than two years and I like it very much because it’s so easy to create, insert and manage all my affiliate links. Most other affiliate plugins just replaces specific words with some affiliate links. In my opinion is this a bad concept and it’s much better to place your affiliate links on specific places using a specific link text or image. This is exactly what you do with ThirstyAffiliates.
A product banner from affiliate links
These days I created an affiliate product banner for the homepage from a product reviews website I own. Building a banner with a X number of products isn’t very difficult, but my plan was to use the links data from ThirstyAffiliates. Most of the reviews on my website have links to different products on Amazon. This is why I bought the ThirstyAffiliates AZON add-on. Using this Amazon importer it’s much faster to import the product name, affiliate link and product image.
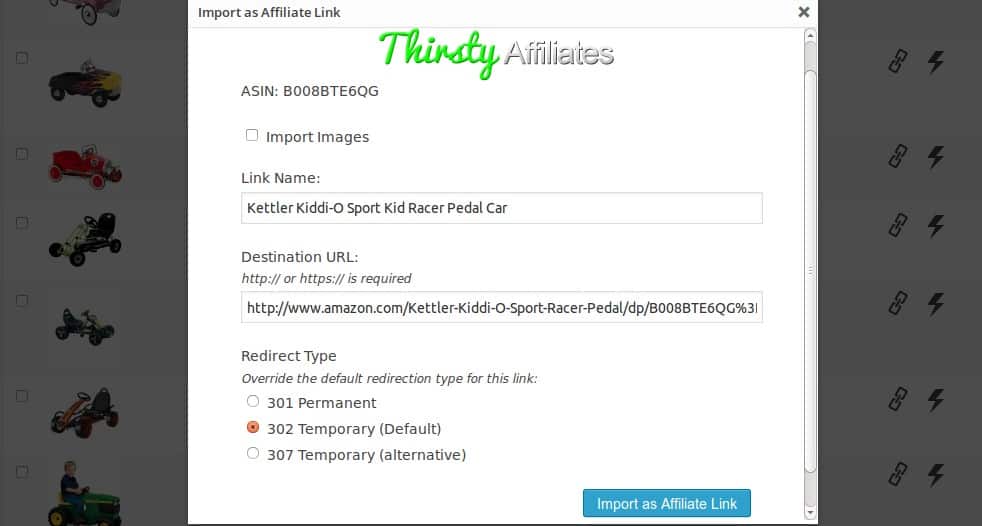
This article is not about the Amazon importer and the shortcode works also for free ThirstyAffiliates plugin.
Banner shortcode for ThirstyAffiliates tutorial
Place this PHP code snippet into your themes functions.php file to make this WordPress shortcode available in any page or blog post.
function create_thirsty_affiliates_banner($atts) {
	if ( post_type_exists( 'thirstylink' ) ) {
		$defaults = array(
			'limit' => 4,
			'category' => '',
			'clickygoal' => '',
			'orderby' => 'latest'
		);
		$atts = shortcode_atts( $defaults, $atts );
		$args = array( 'post_type' => 'thirstylink', 'posts_per_page' => $atts['limit'] );
		if ($atts['category'] != '') {
			$args['tax_query'] = array(
				array(
					'taxonomy' => 'thirstylink-category',
					'field'    => 'slug',
					'terms'    => strtolower($atts['category'])
				),
			);
		}
		if ($atts['orderby'] == 'random') {
			$args['orderby'] = 'rand';
		} else {
			$args['orderby'] = 'date';
			$args['order'] = 'DESC';
		}
		$html = '';
		$query = new WP_Query( $args );
		if ( $query->have_posts() ) {
			$html .= '
			<div class="thirsty-aff-banner">
				<ul class="products">';
			$count = 1;
			while ( $query->have_posts() ) {
				$query->the_post();
				$img = get_attached_media( 'image' , get_the_ID());
				reset($img);
				$first_img = key($img);
				$thumb = wp_get_attachment_image_src( $first_img, array(200, 200) );
				$last = ($count == $atts['limit']) ? ' last' : '';
				$clicky = ($atts['clickygoal'] != '') ? ' onclick="clicky.goal(\''.$atts['clickygoal'].'\');"' :'';
				$html .= '
					<li class="product'.$last.'"><a href="'.get_permalink().'" target="_blank" rel="nofollow"'.$clicky.'><img src="'.$thumb[0].'" alt="'.get_the_title().'"><h3>'.get_the_title().'</h3></a></li>';
				$count++;
			}
			$html .= '
				</ul>
			</div>';
		} else {
			$html .= '<p>No items available.</p>';
		}
		wp_reset_postdata();
		return $html;
	}
}
add_shortcode('ThirstyAffBanner', 'create_thirsty_affiliates_banner');
Check the following information to understand what I did in this custom PHP function.
- First I check that the custom post type “thirstylink” really exists.
- The defaults array is used for the function shortcode_atts() to create the values used by that shortcode if none of them are entered. By default the script does a query for the four latest ThirstyAffiliates links.
- Next I create an array with arguments for the WP_Query object. It’s possible to query only links from a specific ThirstyAffiliates category. Only if the category value is available, the taxonomy query is added as an argument.
- The WHILE loop will return the different post objects. All images are attached to the link post using a parent_id relation. So I request the images using the function get_attached_media().
- I use only the first image for each link object and that’s why I use the reset() function on the array called $img to select afterwards the key for the first array element.
- With that key (the child post ID) I’m able to get the image information for this attachment. I use the function wp_get_attachment_image_src() to get the right image URL for each ThirstyAffiliates link object. Note, that I use a 200×200 pixel image. You need to modify this image size using the media settings or add a new one by using the add_image_size() function (or change these values).
- The next IF/ELSE statements checks for the last post object from our query. I need this test to add the CSS pseudo class “last” to the unordered list element.
- I’m a huge fan of Clicky web analytics and that’s why I added an option to include a dynamic goal for each link object. The “reached goal” information is submitted to Clicky at the moment that a visitor has clicked a link.
- Now I have all information for the link and build the HTML node.
- At the end I use the function wp_reset_postdata() to restore the global $post variable and the function returns the HTML for the banner.
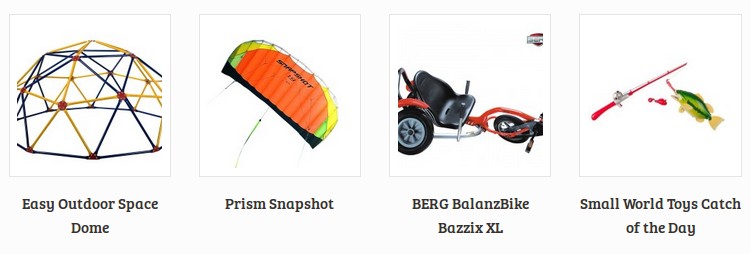
Use the shortcode [ThirstyAffBanner] or [ThirstyAffBanner category=”homepage” orderby=”random”] in your posts or pages and show a banner like below.
Published in: WordPress Development
These days I changed the URL structure for my affiliate links to make the more accessible for my website’s visitors. My old links didn’t used any category inside the link URL and I used only a “go” plus a slug which was built from the product or link name. While doing this I get in trouble with the main category I like to use for the slug/URL and the category I’m using to show a selection of products for this banner shortcode. I solved this by creating a custom taxonomy (tag) for the ThirstyAffiliates post type:
function thirsty_tags_tax() {
	if ( post_type_exists( 'thirstylink' ) ) {
		register_taxonomy(
			'thirstytag',
			'thirstylink',
			array(
				'label' => __( 'Thirsty Tag' )
			)
		);
	}
}
add_action( 'init', 'thirsty_tags_tax' );
If you do the same you need to change the value for the taxonomy inside the function from “thirstylink-category” to “thirstytag”. After this is done you can create tags for your affiliate links. Tip! If you use WordPress SEO by Yoast, than don’t forget to change the settings for: “XML Sitemaps” and “Titles & Metas”