How to build a WordPress image slider
Our last article about the Meteor slides plugin was about how to use the plugin for your WordPress website and doesn’t require any programming skills. My article today is about building a WordPress image slider from the ground up without using a plugin. Actually this is not totally true, because the tutorial is “only” about the WordPress part and we will be using a readymade slideshow plugin written in jQuery. I’m using the tutorial code for my own website as well, check the demo right below.

WordPress image slider tutorial
 Most image slider plugins are based on a third party slideshow plugin, written in jQuery or JavaScript. This is not surprising, because building a responsive and flexible slideshow is a different task than writing a few blocks of PHP code in WordPress. I’m going to show you how to use the same code most slider plugins use to integrate and control a slider function right in your WordPress blog post. I’m using Flexslider 2, a jQuery plugin maintained by WooThemes. WooThemes has built Flexslider 2 as the basis for their own premium WordPress themes and plugin. Reason enough to use their jQuery plugin for this WordPress tutorial.
Prepare your WordPress theme
All the tutorial code needs to be placed in your theme’s functions.php file, but before we can do that, we need to copy some files from the Flexslider jQuery plugin into the theme’s directory as well. Create a directory called flexslider in your themes directory. Download the Flexslider 2 plugin and upload the files flexslider.css and jquery.flexslider-min.js including the directories named fonts and images into the flexslider directory you just created.
The following two functions are used to include the necessary JavaScript and CSS code into your theme footer. I’m using a “special method” I’ve found on Scribu.net to include these files inside the footer to keep my theme files fast. Many plugin developers include JS/CSS files on every page, post or even archive pages. The function print_my_script() below will include the JS/CSS files only on those pages where the slider shortcode is actually used.
add_action('init', 'register_my_scripts');

function register_my_scripts() {
	wp_register_script( 'flexslider', get_stylesheet_directory_uri() . '/flexslider/jquery.flexslider-min.js', array('jquery'), '1.0.0', true );
}

add_action('wp_footer', 'print_my_script', 99);

function print_my_script() {
	global $add_my_script, $ss_atts;
	if ( $add_my_script ) {
		$speed = $ss_atts['slideshowspeed']*1000;
		echo "<script type=\"text/javascript\">
jQuery(document).ready(function($) {
	$('head').prepend($('<link>').attr({
		rel: 'stylesheet',
		type: 'text/css',
		media: 'screen',
		href: '" . get_stylesheet_directory_uri() . "/flexslider/flexslider.css'
	}));
	$('.flexslider').flexslider({
		animation: '".$ss_atts['animation']."',
		slideshowSpeed: ".$speed.",
		controlNav: false
	});
});
</script>";
		wp_print_scripts('flexslider');
	} else {
		return;
	}
}
The first function registers the JavaScript file and the second function will output (print) all the other code, including the code for Flexslider 2, into the footer of your theme. Note the variable $add_my_scripts is used as a kind of filter. I will explain later how this filter works.
Custom post type and taxonomy
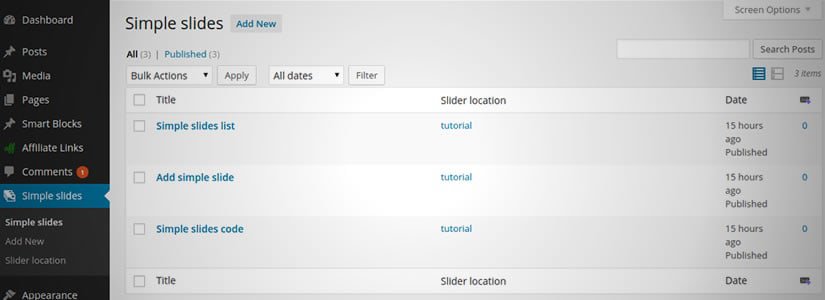
I created a custom post type for all the different sliders I will later create for my website. The custom taxonomy is used to bundle these slides (posts) into one or more slideshows.
add_action( 'init', 'create_slider_posttype' );
function create_slider_posttype() {
    $args = array(
      'public' => false,
      'show_ui' => true,
      'menu_icon' => 'dashicons-images-alt',
      'capability_type' => 'page',
      'rewrite' => array( 'slider-loc', 'post_tag' ),
      'label'  => 'Simple slides',
      'supports' => array( 'title', 'editor', 'custom-fields', 'thumbnail', 'page-attributes')
    );
    register_post_type( 'slider', $args );
}

add_action( 'init', 'create_slider_location_tax' );
function create_slider_location_tax() {
	register_taxonomy(
		'slider-loc',
		'slider',
		array(
			'label' => 'Slider location',
			'public' => false,
			'show_ui' => true,
			'show_admin_column' => true,
			'rewrite' => false
		)
	);
}
For the custom post type I use the set public to false to keep the slider posts out of the results from any search engine. I do the same for the custom taxonomy named slide-loc. For the post type, I have enabled only the fields I really need. That includes the custom field, which I use for the target URL behind each slide.
The following small function is responsible for creating a post meta value for each slide. This value is used as a default URL value for the custom field.
add_action('wp_insert_post', 'set_default_slidermeta');

function set_default_slidermeta($post_ID){
    add_post_meta($post_ID, 'slider-url', 'http://', true);
    return $post_ID;
}
WordPress image slider shortcode
The last part of code is used to show your slideshow inside a post, page, theme or any other place where the usage of a shortcode is possible.
add_shortcode( 'simpleslider', 'simple_slider_shortcode' );

function simple_slider_shortcode($atts = null) {
	global $add_my_script, $ss_atts;
	$add_my_script = true;
	$ss_atts = shortcode_atts(
		array(
			'location' => '',
			'limit' => -1,
			'ulid' => 'flexid',
			'animation' => 'slide',
			'slideshowspeed' => 5
		), $atts, 'simpleslider'
	);
	$args = array(
		'post_type' => 'slider',
		'posts_per_page' => $ss_atts['limit'],
		'orderby' => 'menu_order',
		'order' => 'ASC'
	);
	if ($ss_atts['location'] != '') {
		$args['tax_query'] = array(
			array( 'taxonomy' => 'slider-loc', 'field' => 'slug', 'terms' => $ss_atts['location'] )
		);
	}
	$the_query = new WP_Query( $args );
	$slides = array();
	if ( $the_query->have_posts() ) {
		while ( $the_query->have_posts() ) {
			$the_query->the_post();
			$imghtml = get_the_post_thumbnail(get_the_ID(), 'full');
			$url = get_post_meta(get_the_ID(), 'slider-url', true);
			if ($url != '' && $url != 'http://') {
				$imghtml = '<a href="'.$url.'">'.$imghtml.'</a>';
			}
			$slides[] = '
				<li>
					<div class="slide-media">'.$imghtml.'</div>
					<div class="slide-content">
						<h3 class="slide-title">'.get_the_title().'</h3>
						<div class="slide-text">'.get_the_content().'</div>
					</div>
				</li>';
		}
	}
	wp_reset_query();
	return '
	<div class="flexslider" id="'.$ss_atts['ulid'].'">
		<ul class="slides">
			'.implode('', $slides).'
		</ul>
	</div>';
}
This shortcode accepts 3 attributes: a slider location, the animation type and the slideshow speed. These values are passed to the database query or the JavaScript snippet. Do you remember the variable $add_my_script I’ve mentioned before? This “global” variable is set right in the shortcode function and takes care about that all Flexslider files are only included on pages or posts where the slideshow shortcode is used! All HTML code for the slideshow is created by this function.
Using the slideshow shortcode and final words
This tutorial is not written for the WordPress beginner, but I’m also sure it’s not too complicated. Just insert a few slides via the new custom post type you have created. Add also a location (custom taxonomy) if needed. Now you can use the three attributes to configure your slideshow a bit, for example the shortcode would be:
[simpleslider location="homepage" animation="slide" slideshowspeed="5"]
This shortcode will show all slides with custom taxonomy “homepage” (the slug) and show them in animation mode “slide” (you can also use “fade”) and the speed is set to 5 seconds. The attributes are not required and if you like to have more options you can add them to the function with the name print_my_spript(). This page shows all available Flexslider 2 properties.
The tutorial code doesn’t have some special style for the slideshow. If you like to use the same style as I used for my demo, copy/paste this CSS code into your theme’s stylesheet.
.flexslider { margin: 0 auto;max-height:300px; }
.slide-content { position: relative;max-width:500px;bottom:70px;left:10px;background-color:#fff;font-size:0.95em;padding:0.45em 0.85em 0.25em;border-radius:3px;overflow: hidden; }
.slide-content h3 { margin:0;font-size:1.5em;color:#4A7BB5; }
.flex-direction-nav a { border-bottom:0;color:#fff;text-shadow: 2px 2px 2px rgba(15, 15, 15, 1);font-size:32px;height:56px;top:140px; }
I’ve put this code together into a plugin, but to get this working you need to upload the Flexslider jQuery plugin into to your WordPress theme directory (check the first part from this tutorial).
Published in: WordPress Development
This is very helpful post for those who want to build WordPress image slider. I just want to know one thing, why you don’t keep the custom post type “public”, because of search engine crawling or there is another reason?
I don’t make the custom post type public to keep them out of the search index. It happens so often that I install a plugin and notice that a huge number of new pages is generated. Pages I don’t like to see in the Google search engine. Sure you can make the noindex with WordPress SEO by Yoast, but it’s much better to use that option. Don’t you think?
Thanks for reply back to my questions .Next time we will definitely use this option. Thanks once again for publishing such valuable information.
I don’t get how to use your slider now. I integrated everything the way you explained in your tutorial, but I can’t seem to figure out how to use it. Tried a bunch of stuff, but it’s simply not clear how you add slider images to the slider. Maybe you should explain that in your tutorial.
Hi,
like I mentioned in my article, this tutorial is not for a beginner ;) Indeed the information that the user need to fill some slide posts was missing. I added this sentence to make that clear too.
You need to insert the slides using the new custom post type. After that you can use the shortcode in any page/post/theme you like.
I’m not a total beginner, per se, but it would be nice to add how to add the images to the slider once the custom post type is created. There seems to be a lot missing from this tutorial.
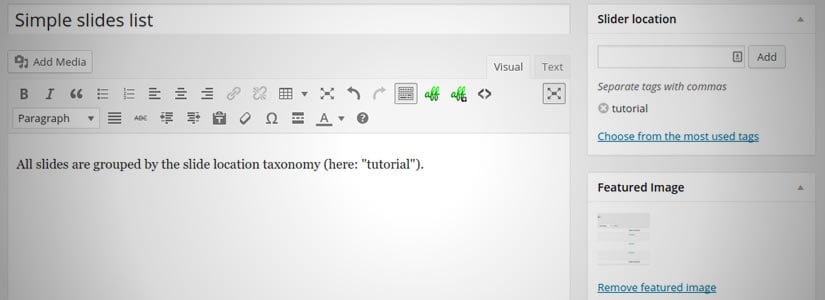
Hi, just use the button inside the featured image meta box (for each slide post you create)
HI there,
this is great. I am using this for a custom theme build. I just have a couple of questions.
first i would like to be able to add a separate slider for the home page, which i will then call on front-page.php. what do you think is the best way to go about this?
1) creating a new custom post type that is just for the home page slider (obviously changing function names)? would this be best?
2) creating slider categories instead of custom taxonomy?
3) any other ways that would be best?
I have previously created custom post categories and am familiar with how to call things and close loops properly with WPQuery (i.e. best practices)
thanks so much for your code.
J
Hello Jay,
Did you noticed the function “create_slider_location_tax”? That one creates already a custom taxonomy and this is used inside the shortcode. So in fact anything you’re looking for is included in the code :)
Fantastic Olaf!
Thanks to you I added a carousel 100% full-page just beyond the primary menu (with a condition, to be sure it is just launch on the front-page), with this code in functions.php file of my strorefront child-theme:
https://pastebin.com/HeuwRuj3
I’m using a static page (not the shop page) and it’s working so nice.
With a little CSS adaptation, it’s a whaooo effect ;) Thank you so much!
PS. The custom taxonomy to fix to the slider location field is also very useful indeed.
Hi, great that it works for you this way.
Hi, this is so confusing. Where do you add “flexslider” folder? To the same folder, where theme is (wp-content/themes?) or to the theme folder?
I get images lined up in a vertical column and no slider. Not sure why.
Hi Sebastian,
the function
get_stylesheet_directory_uri()generates the path to your child theme. This will say you the “flexslider” directory inside the directory of your child theme. Important: Use always a child theme if you do modifications for your WordPress theme.